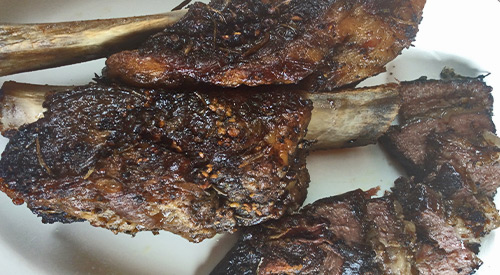
Our finished beef short ribs after applying our techniques we describe in this blog
SMOKED BEEF SHORT RIBS
Of all the cuts of ribs, this is likely my favorite. Found between the 6th and the 10th ribs of the animal, the meat on these ribs lays on top of the bones rather than between them like with back ribs. Short ribs require a method of cooking that will allow them to tenderize as they have a lot more meat, fat, connective tissue and flavor than pork ribs. Because of all that fat and connective tissue, beef short ribs need to be cooked to an internal temperature of 200°F.
Today, I’m going to cook my beef short ribs on the gas grill using an indirect method of cooking and wood chunks to bring great smoke flavor.
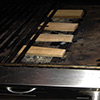
You’ve seen us use our plancha to do squid, now we’re going to smoke some artichoke hearts and mushroom caps using just one application of wood chips. This time, our plancha will be set up with BeechPiccolo® wood chips to infuse wood flavoring into artichoke hearts and button mushroom caps for the ultimate stuffed mushroom appetizer. I’ll take you through the recipe and cooking technique using my plancha on the gas range. Easy entertaining starts here with Stuffed Smoked Artichoke Mushrooms.
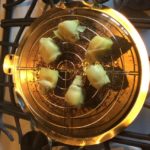
Wood Firing the Artichoke Hearts
We start off with a 14 oz. can of artichoke hearts packed in water. This will be roughly 8 artichoke hearts. After draining, rinsing, and patting dry, we fire up the plancha on our gas range placing a small handful of SmokinLicious® Beech Piccolo° wood chips on the plancha. As the plancha temperature rises close to 300° F, it’s time to add the artichoke hearts to the smoker racks. Place the cover on the plancha and let the artichoke smoke for about 8 minutes, turning one time half way through the cooking time. Then remove the hearts from the plancha, rough chop them, and put aside for the mushroom filling.
Button Mushroom Caps
Next on the plancha go the mushroom caps. We prepared them by first washing them, patting them dry, and then removing the stems. The stems are reserved to be used in the filling mix. If you want extra smoky flavor, feel free to smoke the stems as well but you should smoke them separate from the caps so they don’t shrink and lose too much water.
We’re still using the Beech wood chips that were used for the artichoke hearts as these still have plenty of smoke vapor to be released. Again, these mushroom caps will only take a matter of minutes. Remember, mushrooms are loaded with water so don’t let the caps stay on the plancha too long causing them to shrink and fall apart. Just bronze them with the smoke vapor, then remove to be stuffed. A good sign that they are ready to come off the plancha is when you see a small puddle of water forming in the cap.
Mushroom Cap Filling
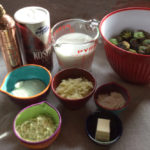
With the artichoke hearts and mushroom caps smoked, it’s time to start on the filling. Here are the ingredients need for the filling:
2 tablespoons unsalted butter
3 cloves garlic, minced
1 small shallot, minced
kosher salt and fresh ground pepper to taste
½ cup dry white wine
1 cup grated parmesan
¾ cup panko breadcrumbs
3 tablespoons finely chopped parsley
1 tablespoon finely chopped thyme
1 egg white
First, I chop the mushroom stems, dice the shallots, and mince the garlic cloves. In goes the butter to a hot skillet, then all three prepared ingredients are added. Once cooked down, the white wine is added to the mixture with cooking continuing until the wine has evaporated. This is a highly aromatic filling that will blend well with the smoky flavors of the artichoke and mushroom.
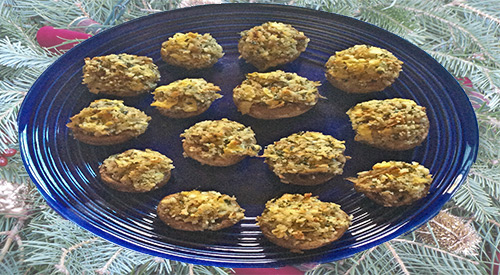
The aromatics are now ready for the rest of the filling ingredients. First, add the chopped smoked artichokes hearts. Next in, the parmesan, bread crumbs, parsley, thyme, and egg white. Mix everything together until it binds well. Time to fill the smoked mushroom caps. Using a teaspoon, I fill each mushroom cap heaping the filling on top. Although we prepared 20 mushroom caps, there is enough filling to do 40-50 caps depending on the size of the mushrooms selected. I place these in a baking dish and slide them into a pre-heated 350°F oven for about 30 minutes.
Soon to be the Favorite Stuffed Mushroom Appetizer
After smoking both the artichoke hearts and the mushroom caps, I infused the filling with the smoked, chopped artichoke hearts. With the additional flavors of parmesan, thyme, parsley, garlic, shallot and wine, these mushroom caps are full of flavors including that subtle smoke undertone. These are sure to become a favorite appetizer or snack. Plus, when done on the plancha, they can be smoked year round without concern for the weather.
Smiling Burmese child before surgery for wide, bi-lateral cleft Lip repair. After surgery photo of same child showing the correction! DINING FOR SMILES EVENTPREPARATIONS
DINING FOR SMILES EVENT PREPARATIONS
With the goal to repair children’s broken smiles by providing free comprehensive treatment for cleft lip and palate anomalies in under-served areas of the world, Alliance for Smiles, founded by six members of the San Francisco Rotary Club, Board member Carl Vahl (Chef Calle) hosted a gourmet, six-course dinner to raise funds for this exceptional cause at the Enchanted Valley Inn. And SmokinLicious® was right there to lend our support. We’re going to provide you with a behind-the-scenes look at what goes in to preparing a six-course gourmet meal featuring wood-fired fresh Canadian salmon and wood-fired leg and loin of lamb.
Dining for Smiles- Early Fire Start
For SmokinLicious®, set up is crucial for a long event that has the menu relying on the perfection of the wood-fired proteins. That means ensuring plenty of charwood and wood chunks are at the ready. We keep two chimney starters loaded with charwood to keep a steady flow of hot coals going into the grills. Since this event’s gourmet menu featured four foods to be wood fired – lamb, salmon, red peppers, and Brussels sprouts – it’s necessary to get the fires going early so they can burn down to hot coal beds. That is the key to successful wood-fire cooking. Don’t cook over flames, only hot coals that will radiate heat throughout the grill.
Smoky bourbon cranberry cocktail is a simple but elegant drink for holiday celebrations during the colder months.
SMOKY BOURBON CRANBERRY COCKTAIL
For those of you who love bourbon, we’ve got a special cocktail for the sampling. This is a rather festive drink containing cranberry. We add an additional layer of flavor by cold smoking the cranberry cocktail syrup for a unique blend of sweet, tart, and smoky. Let’s get started on how it’s done.
Smoky Bourbon Cranberry Cocktail- Making Cranberry Syrup
Our smoked bourbon cranberry cocktail starts with the ingredients for a cocktail syrup. Similar to traditional simple syrup, this one has a bit more acid in the form of white wine vinegar. You’ll need to gather together:
1 cup of fresh or frozen cranberries
1 cup of white wine vinegar
Sugar- 1 cup
You also need a saucepan and heat tolerant spoon.
Start by placing a saucepan over medium-high heat. Add the white wine vinegar and the cup of sugar and stir to dissolve the sugar. Next in, one cup of cranberries, fresh or frozen, though I’m using fresh as they are available at the time of this recipe. Bring the mixture to a boil stirring constantly. Once the sugar is dissolved and the cranberries have reduced, remove from the heat and allow to cool in the saucepan. While the mixture is cooling, let’s prepare the handheld smoker for the smoke vapor infusion.
Cold Smoking is in Your Hand
It’s never been so easy to produce smoked ingredients with the development of the handheld food smoker. It all began with The Smoking Gun™ which is the unit I will be using today, but know there are many options available to you. I set up my handheld food smoker with Sugar Maple Minuto® Wood Chips.
Bringing the cooled saucepan to a table, I have a piece of press and seal at the ready, but you can use plastic wrap, a food storage bag, or vacuum bag, anything that will provide a seal. I seal around the saucepan leaving a small opening to insert the tubing of the food smoker. Turning the unit’s fan on, I light the wood chips and allow the smoke vapor to fill the saucepan. Once filled, I release the tubing from the pan and seal the pan completely with the wrap, allowing the smoke to penetrate the cranberry syrup. The longer the pan stays wrapped, the more smoke flavor the syrup will take on. Once infused, remove the wrap and prepare to make the cocktail.
Smoky Bourbon Cranberry Cocktail- Building a Smoky Cocktail
To make the cocktail, place ice in a rock glass. Add ¼ cup plus a splash of your favorite bourbon. Add two tablespoons of seltzer and two tablespoons of the cranberry syrup. Stir and add a tablespoon of fresh cranberries. It’s now ready to serve! Smoky Bourbon Cranberry Cocktail – a unique drink for all those bourbon lovers you know.
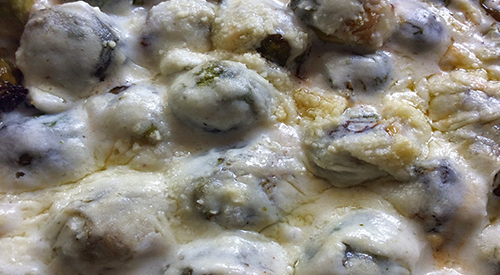
Gratin takes a smoky turn by using smoked brussels sprouts
GRATIN TAKES A SMOKY TURN
Gratin is one of those side dishes that usually gets made at the holidays or for a special occasion dinner. For some reason, it has the stigma of being difficult and time consuming.
Nothing could be further from the truth when you use our gratin recipe.
Most gratin recipes don’t contain a lot of ingredients but the béchamel sauce can be tricky if you don’t stay with your saucepan the whole time. For our gratin recipe you will need:
▪ 2 tablespoons butter
▪ 2 tablespoons flour
▪ coarse salt
▪ fresh ground pepper
▪ 2 cups whole milk
▪ 1/3 cup shredded Asiago cheese
▪ 1/3 cup shredded 2nd cheese like Fontina though I’m using a leek cheese
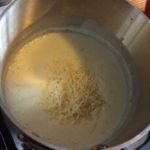
Béchamel sauce is a fancy name for white sauce that starts with a roux of butter and flour. Begin melting two tablespoons of butter in a saucepan. Once melted we add 2 tablespoons of flour and begin the whisking process. This will produce a thick, paste like consistency. Gradually, add the two cups of whole milk, whisking the entire time. This is the key to a good béchamel sauce. Bring the sauce to a boil then reduce to low heat whisking again. Once thickened, season with salt and fresh ground pepper, and remove from the heat. Add in each cheese, whisking each addition until melted.
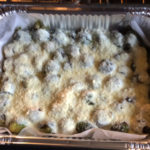
Gratin- Layer on the Flavor
Time to lay the smoked Brussels sprouts in a baking dish. Try to use a dish big enough to make one even layer of sprouts. Pour the béchamel sauce over the Brussels sprouts ensuring an evening coating. Take the 2/3 cup of Parmesan cheese and sprinkle over the sauced sprouts. Place the baking dish in a preheated 350°F oven for 25 minutes until bubbling and golden.
The cheese cuts through the mild bitterness of the Brussels sprouts while the smoke flavor adds that special taste bud tingle.
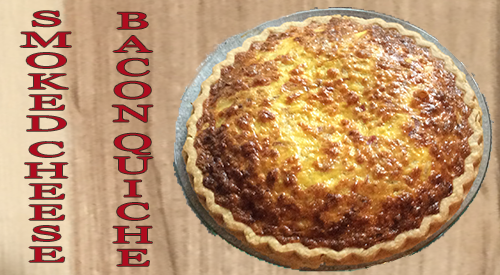
We’re putting a new flavorful twist to traditional quiche by adding a cold smoked cheese combination that’s perfect with this egg and cream based recipe. Be sure to see our previous series on cold smoking cheese on the stove top, then bring your favorite cheeses to this easy, basic recipe. We’re making smoked cheese & bacon quiche!
Smoked Cheese & Bacon Quiche- Simple Ingredients Are Best
Quiche is one of those recipes that doesn’t have a lot of rules. The base is eggs, cream and pie shell or pastry. The fillings are yours to experiment with. For our Smoked Cheese and Bacon Quiche, you’ll need the following ingredients:
We start off our recipe by first cooking the onion. Taking 1 yellow onion, peel the skin and dice this. Add 1 tablespoon of butter to a hot skillet. When melted, add the diced onion. Let this sweat for about 3 minutes until translucent, then stir. Cook until the onion browns and crisps slightly. This should take less than 6 minutes. Remove from heat and set aside while you begin to prepare the wet ingredients.
Basic Quiche Batter
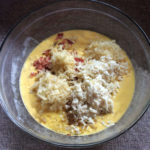
After cooking the onion, it’s time to assemble the other ingredients to our quiche. Start with 6 large eggs in a large bowl. Add the ¾ cup of heavy cream and whisk until combined. Add the cooked onion, followed by the bacon that has been precooked and chopped. If you’re short on time, feel free to use precooked bacon strips commonly available in most grocery stores. Whisk all these ingredients together until well combined.
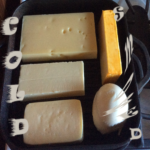
The final ingredients are your favorite smoked cheeses. In my version, I’m using Swiss, muenster, and fresh mozzarella, which have been previously cold smoked for about 4 hours. My technique was a stove top smoking application using a cast iron pan. You can visit our previous series on this technique. Once all the ingredients are combined, it’s time to pour the batter into the prepared pie shell. This recipe will make one 9-inch quiche. Now place in to a preheated 350°F oven for 40-45 minutes.
After cooking in a 350°F oven for about 45 minutes, a golden crust will form on the top. Allow the smoked cheese & bacon quiche to cool slightly before cutting it into serving slices. Loaded with the saltiness of the bacon, the creaminess of the smoked cheese, and the sweetness of the cooked onion, this is a great dish for brunch or dinner, or even served as an hors d’oeuvre. If you want to add more smoke flavor, feel free to ember cook the onions or smoke the bacon. Smoked Cheese & Bacon Quiche – soon to become your favorite quiche recipe!
Did we inspire you to make your own quiche? We need your comment and rating, so subscribe and follow us so you don’t miss a thing. Suggestions are always welcome as well on recipes and techniques you want to learn about. We are your source for all things wood-fired, providing tips, techniques, recipes, and the science behind the fire.
Who doesn’t love a grilled cheese sandwich! We are taking this grilled sandwich favorite and elevating the flavor with a cold smoked cheese assortment. Get the griddle or cast-iron pan ready! We’re making Smoked Grilled Cheese with Tomato and Pepper Jelly!
What You’ll Need
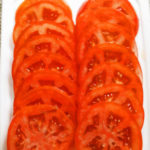
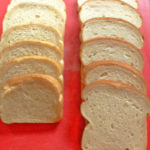
Certainly, you can purchase smoked cheese in the specialty grocery locations but we have a step-by-step series showing you the easy method of stove top smoking cheese that can be done in just a few hours. For our version of the smoked grilled cheese sandwich, you’ll need smoked cheese – we are using an assortment that includes Swiss, muenster, horseradish cheddar, and fresh mozzarella. In addition, you’ll need some fresh sliced tomato – sliced about ¼-inch thick -, a firm bread – we’re using sourdough and salt rising -, hot pepper jelly, and mayonnaise. You’ll also need a griddle, cast iron skillet, or other heavy duty frying pan and spatula for cooking your sandwiches. Oh, and feel free to do this on a grill if you like.
The Assembly
It’s important that your griddle or pan be hot before starting the sandwiches. I recommend a medium setting. If using cast iron, let that pan heat up about 5 minutes before starting the cooking process. First up, take a bread slice and coat one side with mayonnaise. Yes, I said mayonnaise not butter. It produces a nice browning and crisping to the bread beyond what butter can do. Place mayo side down in the pan and add your sliced smoked cheeses. Top with a tomato slice. On the second slice of bread, coat one side with hot pepper jelly, leaving a little bread border near the edges as the jelly will migrate during cooking. Place pepper jelly side down on the tomato. Now coat the face up side of the bread with mayonnaise.
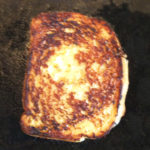
This starts the monitoring stage. You want to peak at one corner of the sandwich after cooking about 3 minutes. If you see golden brown, it’s time to flip the sandwich. Once both sides are cooked, remove to a plate.
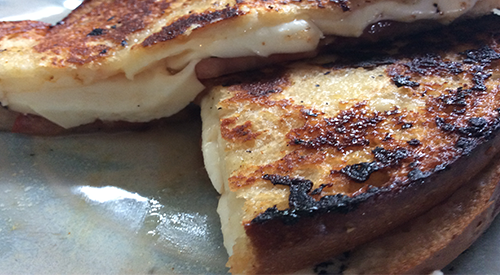
Like No Other
As I have 4 smoked cheeses to choose from, I like to put a combination of cheese on a single sandwich. Once you have a chance to experiment with the different combinations, you’ll find your favorites. It’s important to slice your sandwich on the diagonal while still hot so each half has a chance to marry all the flavors with the bread. Now, kick back and enjoy all that smoky, gooey goodness. Just be sure you have more than one made as it likely won’t be a single sandwich event!
I’ll bet you’ve already come up with your own variation of the Smoked Grilled Cheese Sandwich! Your comments and ratings are much appreciated, so subscribe and follow us so you don’t miss a thing. We always welcome your suggestions as well on recipes and techniques you want to learn about. We are your source for all things wood-fired, providing tips, techniques, recipes, and the science behind the fire.
Tortellini Gets a Smoky Mate with the addition of Cherry wood smoked Brussels Sprouts! This is a medley and yummy recipe for the winter blues
TORTELLINI GETS A SMOKY MATE
There is something about the perfect pasta dish that isn’t necessarily loaded with a ton of ingredients. I’ve found that the perfect pasta often features only 2-3 ingredients in addition to seasonings. For me, the perfection is in how each of those ingredients contribute to the overall dish.
This is a pasta dish that features the smokiness of Brussels sprouts paired with the citric acid of lemon peel. Mix in the sweetness of caramelized onion and a full-bodied dish emerges.
Tortellini Gets a Smoky Mate- A Smoky Start
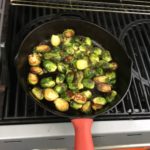
The simplicity of the ingredients is what makes this such a flavorful and pleasurable dish. Start by smoking about a pound of Brussels sprouts – you can see our previous series on how to smoke these on the gas grill, an extremely easy and quick method. Then gather 3 tablespoons butter, 1 medium yellow onion that is thinly sliced, 1 tablespoon extra virgin olive oil or flavored olive oil, 1-1/2 teaspoons Kosher salt, fresh ground pepper, 1 lb. of cheese tortellini, and the zest of 1 lemon. With the Brussels sprouts already smoked, the cooking time for the rest of the dish is about 20 minutes.
Producing Aromatic Flavors
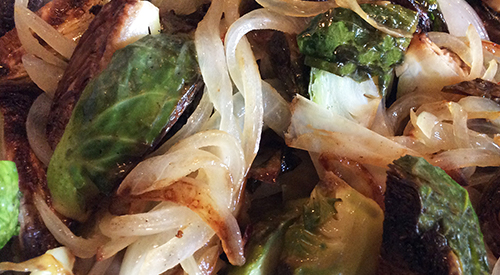
Put a pot of water on for the tortellini to cook according to the packaged directions. What keeps this recipe extra simple is you can use frozen tortellini or fresh packaged rather than making your own and it will be just as spectacular a dish as if you made every ingredient yourself. We start with thinly sliced yellow onion in melted butter, releasing the sweetness of the onion. Once translucent and browning, add the smoked Brussels sprout quarters. Toss together just until the Brussels sprouts heat through.
While the onion and Brussels sprouts cook, our water for the tortellini is salted and brought to a boil. Once at a rolling boil, the pound of cheese tortellini is added. I’m using a frozen variety but you can certainly use fresh. Remember, tortellini is a filled pasta that does not take much time to cook to al dente so don’t turn your back on the pot. It will only be a matter of minutes once the water regains boiling level. Tortellini has the proven sign of being cooked when they float. Once cooked, transfer to a large bowl.
Tortellini Gets a Smoky Mate- Easy Finish
With the tortellini cooked, it’s time to pour the cooked smoky Brussels sprout and onion into the bowl. Once combined, add the tablespoon of olive oil. I’m using a Tuscan flavored olive oil for just a bit more refined flavor but plain EVOO will do. Time to finish this off with fresh ground pepper and salt. The final ingredient – grated lemon zest. Zest right over the bowl. I like a lot of lemon zest so I zest the entire lemon.
After smoking Brussels sprouts using cherry wood, we made a hearty pasta dish that blended the flavors of sweet onion, smoky Brussels sprout, and lemon zest. Added to cheese tortellini gets a smoky mate, this is so flavorful and easy to make. Think of the many variations you can give this dish: adding butternut squash, or zucchini cubes, or perhaps chestnut when in season. Even artichoke hearts. So many opportunities to put your own fingerprint on this dish.
This recipe is sure to give you a great start on incorporating your favorite ingredients. We’d love to hear what you think about our blog post “Tortellini Gets a Smoky Mate” so leave us a comment and subscribe to get all our postings on techniques and recipes. Bringing innovation to wood fired cooking with recipes, techniques and the science behind the fire, that’s SmokinLicious®.
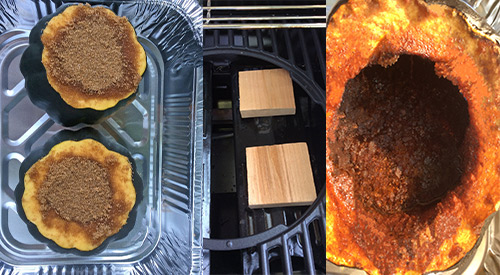
The stages of cooking acorn squash on the grill-stuffing with brown sugar-cooking over wood on the gas grill-finished product!
One of the most popular winter squash that can be found pretty much anytime of the year, acorn squash is rich in fiber and potassium. Time to take this squash favorite and smoke it on the gas grill with cherry wood chunks. But first, we’ll give it some flavorful stuffing to make this exceptionally sweet.
Clean the Acorn Squash
Most acorn squash weigh between 1-2 pounds. After cleaning the outside under running water, cut off the pointed end and ensure the bottom is flat so the squash won’t tip while cooking. Now, scoop out the seeds and membrane until clean, just like you would do with a pumpkin. The seed-free squash is going to be our ingredient vessel that will make the acorn squash so sweet and full of goodness.
Sweeten Things Up
Once the acorn squash is clean of seeds and membrane, it’s time to stuff it. The ingredients are simple: brown sugar mixed with cinnamon and butter. That’s it!
First put approximately ¾ stick of softened butter into the acorn squash center. Then pack in the brown sugar-cinnamon mix. And I mean pack it in! Be sure to press down so the butter and brown sugar mix combine. Once filled, I sprinkle a bit extra of the sugar mixture on the cut top. Now place the acorns in a pan that will be heat safe on the gas grill. Time to prepare the gas grill.
Smoking on the Gas Grill
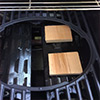
I’ve turned two burners to “on” of my 4-burner grill. I add two SmokinLicious® Single Filet CherryWood Chunks to one of the heat shields on my grill. Next, I add the acorn squash to a roasting pan and set it on the grate of the grill that has the burners turned “off”. This is known as an indirect method of cooking. The squash will cook until tender all the way through. Depending on the size of the squash, this will take between 1-1/2 to 3 hours. Then get ready for the sweet, buttery smooth squash meat!
A Side Dish or Dessert
Even though the butter was placed to the bottom of our squash and the brown sugar mix on top, the lighter weight of the butter will rise to the surface while the brown sugar mix sinks to the base. These ingredients will mix during cooking to sweeten the squash meat. Once tenderized, remove and allow to cool before handling. Then scrap out the squash meat with the cooked butter-brown sugar mix, combine, and enjoy. This is sweet so you can enjoy it as a side dish or as a dessert – a spoonful on pound cake or puffed pastry is define.
How did we do? Leave a comment, love us, and subscribe. We’re all about wood fired cooking techniques, idea, recipes, and the science behind the smoke and fire.
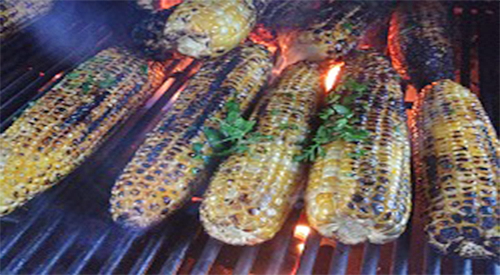
Grilled fresh corn is the one vegetable that you MUST try on any grill!
It’s that time of year! Fresh corn has arrived but not for long. Time to get your hands on a few dozen and do something truly special with this favorite
Grilled Fresh Corn- There’s Nothing Like It!
Yes, you can get corn all year by purchasing in the freezer section of your local grocer. Seriously though. Who wants frozen when by waiting nearly 10 months on the east coast you can have fabulous grilled fresh corn? There is a taste difference between fresh and frozen and boiled and grilled!
On The Grill With Wood For Smoky Char
Corn is one of those vegetables that just begs to be put on the grill. There are many techniques but I prefer to remove the husks and silks, and grill my corn on the cob
with wood chunks on the grill’s heat shields. In answer to the question about soaking the wood in water first – no, I do not do this step as I want my corn kernels to really crackle on the grill. Just see our posting on how to add wood chunks to the LP grill.


 Wood Firing the Artichoke Hearts
 Button Mushroom Caps
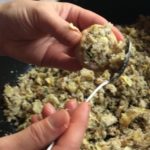


 For
For 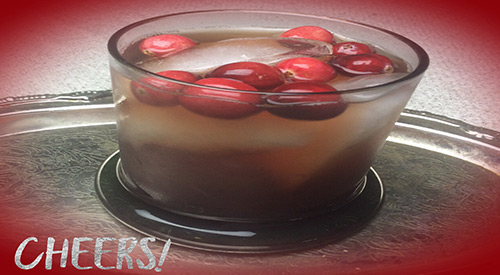


 he simplicity of the ingredients is what makes this such a flavorful and pleasurable dish. Start by smoking about a pound of Brussels sprouts –
 is rich in fiber and potassium. Time to take this squash favorite and
 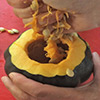 the seeds and membrane until clean, just like you would do with a pumpkin. The seed-free squash is going to be our ingredient vessel that will make the acorn squash so sweet and full of goodness.
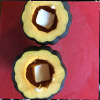 First put approximately ¾ stick of softened butter into the acorn squash center. Then pack in the brown sugar-cinnamon mix. And I mean pack it in! Be sure to press down so the butter and brown sugar mix combine. Once filled, I sprinkle a bit extra of the sugar mixture on the cut top. Now place the acorns in a pan that will be heat safe on the gas grill. Time to prepare the gas grill.
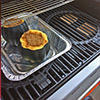 the burners turned “off”. This is known as an indirect method of cooking. The squash will cook until tender all the way through. Depending on the size of the squash, this will take between 1-1/2 to 3 hours. Then get ready for the sweet, buttery smooth squash meat!
 cool before handling. Then scrap out the squash meat with the cooked butter-brown sugar mix, combine, and enjoy. This is sweet so you can enjoy it as a side dish or as a dessert – a spoonful on pound cake or puffed pastry is define.