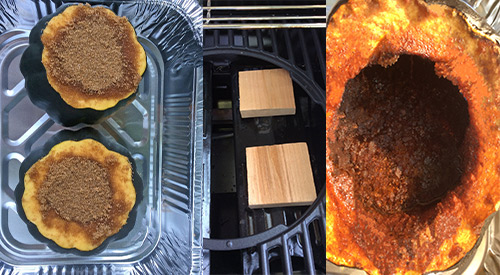
The three stages of preparing acorn squash on the grill-propped-cooking over wood-finished product!

The stages of cooking acorn squash on the grill-stuffing with brown sugar-cooking over wood on the gas grill-finished product!

listen to audio button


One of the most popular winter squash that can be found pretty much anytime of the year, acorn squash cherry wood placed on the diffuser of the gas grill to add a smokey flavoris rich in fiber and potassium. Time to take this squash favorite and smoke it on the gas grill with cherry wood chunks. But first, we’ll give it some flavorful stuffing to make this exceptionally sweet.
Clean the Acorn Squash

Most acorn squash weigh between 1-2 pounds. After cleaning the outside under running water, cut off the pointed end and ensure the bottom is flat so the squash won’t tip while cooking. Now, scoop out cut off the top and then scoop out the seeds to provide a great vessal for the sugar and spicesthe seeds and membrane until clean, just like you would do with a pumpkin. The seed-free squash is going to be our ingredient vessel that will make the acorn squash so sweet and full of goodness.
Sweeten Things Up

Once the acorn squash is clean of seeds and membrane, it’s time to stuff it. The ingredients are simple: brown sugar mixed with cinnamon and butter. That’s it!

into the cavity of the squash add 3/4 stick of butter First put approximately ¾ stick of softened butter into the acorn squash center. Then pack in the brown sugar-cinnamon mix. And I mean pack it in! Be sure to press down so the butter and brown sugar mix combine. Once filled, I sprinkle a bit extra of the sugar mixture on the cut top. Now place the acorns in a pan that will be heat safe on the gas grill. Time to prepare the gas grill.

Smoking on the Gas Grill

I’ve turned two burners to “on” of my 4-burner grill. I add two SmokinLicious® Single Filet Cherry Wood Chunks to one of the heat shields on my grill. Next, I add the acorn squash to a roasting pan and set it on the grate of the grill that has the pan with the squash is placed on the non heated side of the grill, while the heated side has the double filet cherry wood chunksthe burners turned “off”. This is known as an indirect method of cooking. The squash will cook until tender all the way through. Depending on the size of the squash, this will take between 1-1/2 to 3 hours. Then get ready for the sweet, buttery smooth squash meat!
A Side Dish or Dessert

Even though the butter was placed to the bottom of our squash and the brown sugar mix on top, the lighter weight of the butter will rise to the surface while the brown sugar mix sinks to the base. These ingredients will mix during cooking to sweeten the squash meat. Once tenderized, remove and allow to cool before handling. Then scrap out the squash meat with the cooked butter-brown sugar mix, combine, and enjoy. This is sweet so you can enjoy it as a side dish or as a dessert – a spoonful on pound cake or puffed pastry is define.

How did we do? Leave a comment, love us, and subscribe. We’re all about wood fired cooking techniques, idea, recipes, and the science behind the smoke and fire.


Related reading:

-HOW TO TURN YOUR LP/GAS GRILL INTO A SMOKER

-Stove Top Smoked Butternut Squash

-Smoked Squash & Kale Soup

Purchase products:

Wood Chunks- Single Filet

Dr Smoke- <em>"Try this sweet and savory recipe on your gas grill to add a little flare to your outdoor barbecue."</em>

Dr Smoke- “Try this sweet and savory recipe on your gas grill to add a little flare to your outdoor barbecue.”
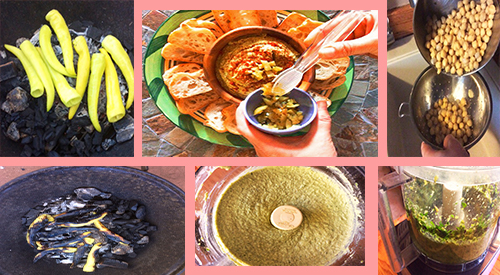
Spicy-char hummus is made by grilling/smoking the hot peppers and then add to your Hummus! Great way to keep the grill flavors when the weather turns colder! Our photo collage shows the different steps to make spicy-char hummus.

Spicy-char hummus is made by grilling/smoking the hot peppers and then add to your Hummus! Great way to keep the grill flavors when the weather turns colder!

Let's try Spicy-Char HJummus Click To Tweet

Listen to our blog

The centuries old Arabic bean dip has gained in popularity substantially over the past few years in United States. Part of the draw is the fact that hummus is high in protein and fiber, and low in fat.

(more…)

This smoked potato curry smells and tastes awesome! Try this around a holiday to just add a small smoky flavor to a favorite vegetable.

This smoked potato curry smells and tastes awesome! Try this around any holiday to add a hint of smoky flavor to this popular vegetable!

Smoked Potato Curry Smokinlicious® style Click To Tweet

Listen to our blog

Whenever we reach the transition between Winter and Spring, I like to start transitioning my meals from hearty comfort foods to a bit more health conscious to prepare for the “less clothes” season coming. Since I’m in the southwestern portion of New York State, our warmer temperatures can be a long way away from the calendar date of the first day of Spring.

(more…)

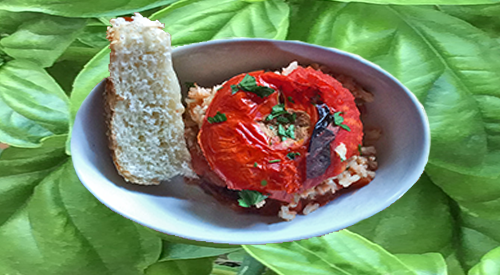
Wood fired stuffed tomato with Rice!

Wood fired stuffed tomato with Rice!

SUCCULENT WOOD FIRED STUFFED TOMATO WITH HERB RICE

listen to this blog

It’s tomato season! Boy, do we have a great technique for you to try on your charcoal grill as well as a tasty recipe to make- wood fired stuffed tomato.

Bring 8 large tomatoes in from the garden or purchased at the fresh market, clean out the charcoal grill, fire pit, or fireplace, and give a few hours to a great cooking experience and exceptionally flavorful recipe.

(more…)

Ember roasted zucchini & Ricotta Galette is a superb recipe to entertain your guests palette

Ember fired zucchini & ricotta galette is a superb recipe to entertain your guests palette

Try our ember fired Zucchini with a galette twist Click To Tweet

Listen to our blog

We are going French with a zucchini & ricotta galette that is simply out of this world. With ember fired zucchini we previously cooked on our charcoal grill with straight wood, this is one recipe worth making any time of year. Get 2 zucchini ember cooked and prepare yourself for the ultimate in wood fired flavors featuring summer zucchini!

(more…)

Our guest blogger provides great insights into grilling a Beer-Can Chicken

Our guest blogger provides great insights into grilling a Beer-Can Chicken

GRILLING A BEER-CAN CHICKEN

Guest Blogger:

Source: eReplacementParts Blog

Author: John Thomas

Beer Can Chicken- The “Wow” Factor:

What says “grill master” more than grilling a whole chicken sitting on top of a can of beer that is infusing flavor and moisture into your bird? Beer-can chicken is often overlooked on the menu, but it’s a fun and proven way to grill a tasty whole chicken. Grab a whole chicken from the grocery store and beer or even some root beer or soda and get that thing on the grill for a guaranteed successful meal. This is an easy method for grilling a flavorful and tender chicken that keeps all eyes on the grill and provides that “wow” factor for any cookout you host.

Sure, it’s called “beer-can chicken,” but that doesn’t necessarily mean you have to use beer. There are tons of flavorful canned beverages out there if you are so inclined to something else. Any soda will make your chicken pop, or even an empty can with a little water and garlic. Beers like imperial stouts, pilsners, or lagers are great, but some other fun ideas include orange soda, cola, or root beer. Regardless, pick your favorite beer or soda. The first key to sitting your bird on top of a can is to make sure you start with room temperature beer or soda. You want that liquid to steam and if you start off with a cold beverage, it just might not get hot enough. Second, don’t use a full can. It takes a lot of heat to get that liquid to steam, so empty at least half the can prior to inserting it into the cavity of the chicken.

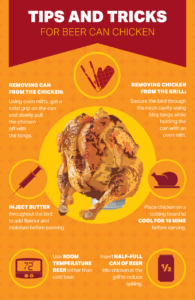
Tips and Tricks infographics

Beer Can Chicken- Two Recipe Choices:

For those of you who choose not to grill with beer, the first recipe choice offered here is a BBQ root beer chicken. This flavorful bird has a classic BBQ dry rub on the outside and root-beer-infused sweet flavor and moisture on the inside. The bird is brushed with any BBQ sauce you like toward the end of the cooking. After cleaning out the chicken, mix these dry ingredients together and heavily apply this simple BBQ dry rub all over the bird.

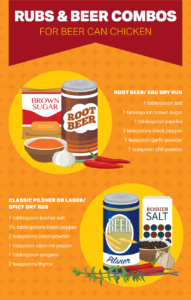
Rub infographics

1 tablespoon salt
1 tablespoon brown sugar
1 tablespoon paprika
2 teaspoons black pepper
1 teaspoon garlic powder
1 teaspoon chili powder

Place the chicken on top of a can of root beer and grill as instructed below. If root beer isn’t your thing, orange soda can be substituted in this recipe.

The second recipe is more of a classic beer-can chicken that has a spicy dry rub applied to the outside. A classic pilsner or lager is used to provide moisture and flavor to the bird. The ingredients for the spicy dry rub recipe are as follows:

1 tablespoon kosher salt
5 tablespoons black pepper
2 teaspoons onion powder
1 teaspoon cayenne pepper
1 tablespoon oregano
2 teaspoons thyme
2 teaspoons paprika
1 teaspoon garlic powder
1 tablespoon red pepper flakes

Clean out the bird and heavily apply the dry rub all over the outside. For an extra pop, a poultry butter injection inside the bird is fantastic. Most grocery stores sell a food injection needle set. Melt some butter and inject it into the thickest part of the breast and into the legs and thighs. The buttery flavor can’t be beaten.

Now that you have applied your dry rub to the chicken, set up the grill for indirect heat. For indirect heat, place charcoal on half the grill and cook the bird on the other half, above an aluminum tin to catch drippings. Grilling the chicken at a more moderate temperature reduces the chance of scorching the bird on the outside and undercooking the inside. On a gas grill, ignite the burners on only one side to medium-high heat. You want the grill to be at about 400-425 degrees for grilling a beer-can chicken.

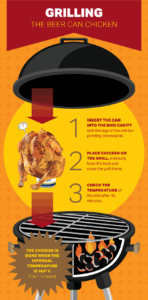
Grilling infographics

It’s easiest to insert the can into the bird right at the grill to avoid it tipping over inside the house. The legs of the chicken extend down toward the grill and the can is inserted into the cavity between the drumsticks. After the grill is pre-heated, set the chicken, neatly propped up on top of the can, on the indirect heat side of the grill and close the grill dome. After about 45 minutes, check the internal temperature of the bird. The chicken will be done when the internal temperature is 165˚F. It should take about 1 to 1-1/2 hours to fully cook the bird, depending on your grill temperature.

Once your chicken reaches 165 degrees, you’ll need to remove the can and the chicken from the grill. Take some extra care to safely remove the bird from the grill. Use grill tongs placed in the neck cavity to secure the bird from the top while carefully holding the bottom of the can with some oven mitts or pot holders. The can will be hot and you can burn yourself and you don’t want to spill any liquid from the can. Get a solid grip on the can with your oven mitt/pot holder and slowly pull the chicken off the can with your tongs, then place it on a plate or cutting board. Leave the can on or near the grill and allow it to cool. Bring the bird inside for a quick 10-minute rest followed by carving.

Beer-can chicken is a fun way to grill an entire chicken. The method places the bird in an ideal position for grilling while providing a flavorful, inventive moisture source underneath. Try experimenting with any soda or beer you might like. You’re guaranteed a juicy chicken with a unique grilled flavor. Hope you enjoyed the bloggers Grilling a Beer-Can Chicken!

Source: eReplacementParts Blog

Author: John Thomas

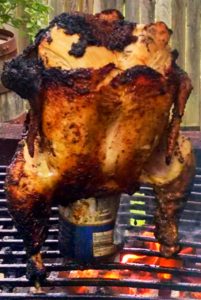
Our culinary crew tested this recipe on open fire pit! Below are our results:

The culinary crew tested this recipe on an open pit cooking area! We were satisfied with the outcome and are passing on this recipe to you!

The culinary crew tested this recipe on an open pit cooking area using Smokinlicious® Double Filet! We were satisfied with the outcome and are passing on this recipe to you!

Smokinlicious® Double Filet


Dr Smoke

Dr. Smoke- Our team found this to be an easy recipe “grilling a beer-can chicken” submitted to us as a “guest” blogger! You should try it!

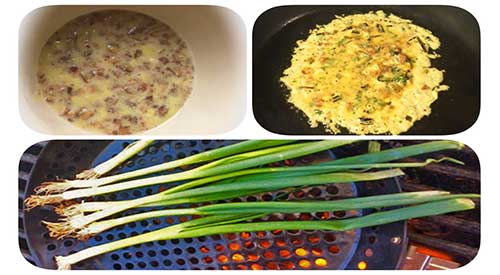
Smoking of Spring onions brings a new flavor when you add to a pancake for Spring onion pancake

Smoking of Spring onions for a spring onion pancake.

let's make a yummy Smoked Spring Onion Pancake! Click To Tweet

Listen to our blog

Spring onion is now in season and ready for all your great recipes calling for green onion or chives. Today, we’re going to bring an extra flavor level to this favorite seasonal onion by smoking it first and then incorporating it into a savory “pancake” recipe.

(more…)

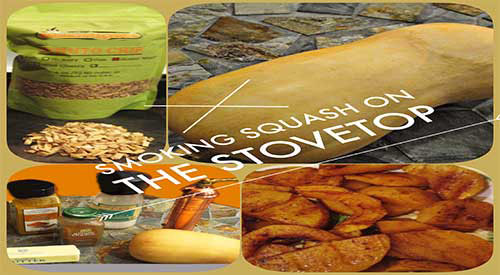
You can do it! Stove top smoked butternut squash!

You can do it! Stove top smoked butternut squash!

Try stove top smoked butternut squash Click To Tweet


Listen to our blog


It’s squash season and that means you have a tremendous variety of product available to do many styles of cooking. How about trying your hand at stovetop smoking? Today, I’m featuring the very popular butternut squash. You’ll need a stovetop smoker or a cast iron skillet or Dutch oven with an insert pan and lid, Minuto Chips® in Size #4 from SmokinLicious®, and about 1 hour of time. Be sure you also have a hood vent where you will be using the stovetop smoker. Now let’s gather our ingredients and get ready to infuse great wood-fired flavor!

(more…)

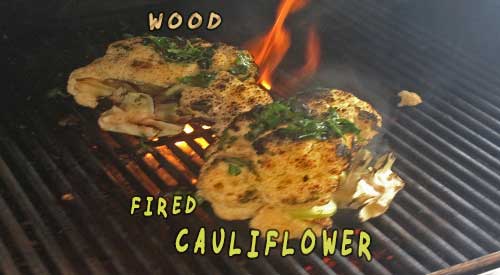
Look at this great head of wood fired cauliflower over wood chunks!

Look at this great head of wood fired cauliflower over wood chunks!

Try Wood Fired Cauliflower on Your Gas Grill! Click To Tweet


It’s time to bring your vegetables into grilling season! Nothing beats the smell of a fresh garden vegetable roasting over wood even on an LP/gas grill. Make this the time of the year you’ll get great char wood flavour in your seasonal vegetables.

(more…)

« Previous Page