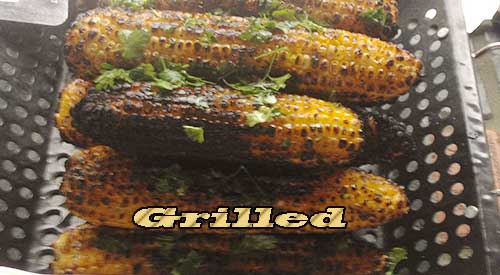
Wood flavoured grilled Corn on the Cob Topped with Fresh Parsley

Wood flavoured grilled Corn on the Cob Topped with Fresh Parsley

Have you ever thought of roasting fresh corn on your lp/gas grill and adding wood flavouring?

Our culinary team has produced a two-part video series outlining how we Wood flavoured grilled Corn on the grill! It is so easy to do, especially this time of year when the corn harvest is abundant! Add this as a great side to your dinner, make a wood-fired salsa with the corn, freeze the corn for grilling enjoyment in the middle of the winter season. Unless you are like us and we ate the full dozen just after the grilling and pictures.

Ingredients for Wood Grilled Fresh Corn:

  • Gas/LP grill
  • 1-2 dozen ears of corn with husks
  • 8-12 double filet Smokinlicious® wood chunks. (We used Sugar Maple but any species will work- consult the flavour chart)
  • 1 stick of butter
  • 1/2 cup of fresh parsley chopped
  • 1 hour of fun grilling time, the noise of the corn popping on the grill is free and will excite your guests!

There’s Nothing Like Grilled Fresh Corn

Yes, you can get corn all year by purchasing in the freezer section of your local grocer. Seriously though. Who wants frozen when by waiting nearly 10 months on the east coast you can have fabulous fresh corn? There is a taste difference between fresh and frozen!

On The Grill With Wood For Smoky Char

Corn is one of those vegetables that just begs to be put on the grill. There are many techniques but I prefer to remove the husks and silks, and grill my corn on the cob with wood chunks on the grill’s heat shields. In answer to the question about soaking the wood in water first – no, I do not do this step as I want my corn kernels to really crackle on the grill. Just see our posting on how to add wood chunks to the LP grill (http://www.smokinlicious.com/blog/how-to-turn-your-lpgas-grill-into-a-smoker/).

Perfect Wood Makes Perfect Char

SmokinLicious® double filet wood chunks are the perfect size for flavoring as well as fit on most grills. From start to finish, you can easily do a couple dozen ears of corn in about an hour. With this technique, I just need 4-5 wood chunks on one of the heat shields. That will provide enough smoke vapor to collect in the grill’s cooking area to ensure every ear is equally charred and flavored. Next, simply monitor for the need to turn the corn with tongs to produce an even char. Keep in mind, just like popcorn kernels, you will hear some of the raw corn kernels heat up and pop/crackle while cooking. This makes for the sweetest end to your cooking tasks!

So Many Recipe Options for Grilled Fresh Corn

Once I near the end of the corn’s cooking, I snip some fresh herbs from the garden like mint, parsley, and even lavender. I melt butter and add the chopped herbs to the pot. I then brush the nearly cooked corn with this aromatic mix and seal in all the great flavors – smoky, sweet, buttery – just perfect.

After I’ve consumed some of my masterpiece, I remove the kernels from the cob to a large bowl using a knife. This corn will be split into freezer bags and stored for winter recipe cooking that will allow me to bring back the taste of summer.

Need inspiration on what to do with all that corn? Think Cowboy Salsa, Corn Succotash, Smoky Cornbread, Corn Cakes, Corn-Potato Chowder, Corn Pudding, Corn Grits, and so much more. I bet you want to hit the corn stand now! Get going!

Did we inspire you? We’d love to see your photos of your grilled corn and corn recipes. Leave a comment and subscribe. Keep following us as we bring you innovative tips, techniques, and recipes on working with wood for cooking, grilling & smoking.

BON BAR B Q

The Culinary Team wants you to know …

… that char-grilled corn on the cob has many advantages of adding smoky flavor to your summer and early fall food enjoyment. Give this simple smoked corn salsa a try. Slice off the charred kernels of four ears of corn, dice a Spanish onion and a grilled sweet pepper. Combine the mixture with an 1/8 cup of balsamic vinegar, a teaspoon of olive oil, dash of worcestershire sauce, juice of a lime and a few shots of hot sauce. It’s that easy and so good!

SmokinLicious Products Used for the Recipe:

Wood Chunks- Double Filet

For more reading related to Wood Flavoured Grilled Corn, try these recipes

For more reading related to Wood Flavoured Grilled Corn, try these recipes

Related recipes:

TRY THIS- SPICY BUTTER FOR SMOKY GRILLED CORN

Easy, Rustic & ‘Oh So Good!’– Ember Cooked Sweet Peppers

GRILL YOUR FRESH CORN ON THE COB FOR A GREAT FLAVOR!

Dr. Smoke

Dr. Smoke- Wood flavoured grilled fresh Corn on the cob is a treat! Using our best wood chunks for smoking-add this to your smoky corn on the cob recipes!
 

OUR CROSTINI WITH SMOKED ASPARAGUS RECIPE IS YUMMY!

OUR CROSTINI WITH SMOKED ASPARAGUS RECIPE IS YUMMY!

Try this crostini with Smoked Asparagus recipe- yummy! Click To Tweet

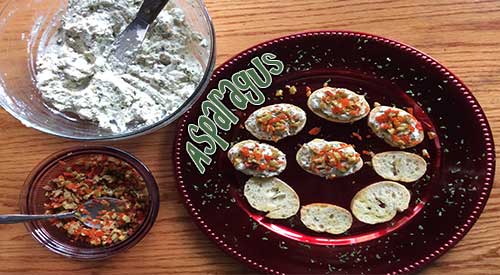
It’s Asparagus season and that means you should get the most out of this sensational vegetable while it’s fresh! Be sure to visit our series on the ember roasting of fresh asparagus (see the previous blog) so you can move on to our fabulous recipes. Our featured recipe in this series is Crostini with Ember Roasted Asparagus, Pimento & Olive Spread, a perfect snack, appetizer, and certainly a spur of the moment food for the pop in visitor. So, here we go!

(more…)

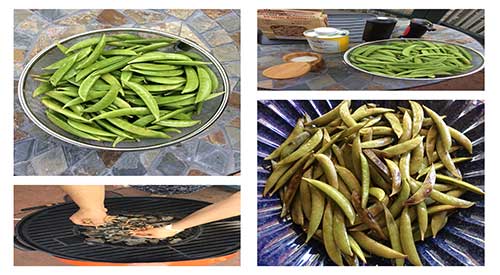
Smoking Snow Peas steps featured in this blog.

Smoking Snow Peas steps featured in this blog.

Let's try smoking Snow Peas! Click To Tweet

Listen to our blog

One of the most versatile vegetables is now in season and can be used in both hot and cold side dishes and main courses. In this series, we will be roasting our peas using a hot smoking method to bring the great wood-fired flavour.

Ingredients- Smoking Snow Peas

  • At least 1 lb of peas, I like sugar snap peas
  • Almond oil
  • Sea Salt & Fresh Pepper
  • A charcoal smoker, any size will do
  • A disposable foil pan or vegetable pan or basket that is high heat tolerant
  • 3 lbs. of lump hardwood charcoal
  • 1 cup SmokinLicious® Grande Sapore® Wood Chips – I’ll be using Wild Cherry
  • Kitchen torch for easy lighting

I’ll be using my Stok Drum Charcoal Grill for this series. As the Stok has its own charcoal basket, I won’t need to prepare any additional lump hardwood charcoal. I am using a direct method of cooking. I place my charcoal in the unit’s charcoal basket leaving my grate insert off for now. Once the coals turn gray, I will lift the charcoal basket and allow the coals to advance into the cooking drum. I then grate insert off as I will use my vegetable pan to go right over the top of the insert area.

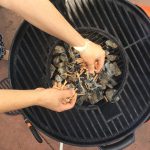
Adding the wood chips to the charcoal fire in our Stok kettle grill

Adding Grande Sapore cherry wood chips

Pea Preparation

While the coals have been firing, I start preparation on the peas. As I am using sugar snap peas for this recipe there is very little preparation that has to be done. I first will remove all the string membrane that is attached to one side of the snap pea. If any stems are left on, I will remove those as well. I then wash the peas in a colander and then allow them to drip dry, shaking my colander occasionally to rid any excess water. If needed, I will pat dry the peas to ensure they are ready for the fire. Then I sprinkle on some Almond oil, sea salt, and fresh pepper to the peas. Now, we’re ready to wood fire!

My coals are hot, the wood chips are smoking, and the peas are ready to be kissed by fire! I place the vegetable pan on the center of the grill and leave my grill cover off. When cooking with wood, know that some temperature fluctuation can occur due to the natural variation in combustion so don’t leave the Peas unattended. Once you see the peas start to char, give them a toss with a spoon to ensure an even char cook.

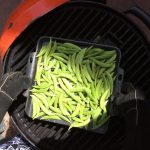
Placing the peas on the Stok grill pan

Placing the peas on the Stok grill pan

Usually, you will see char begin about 4-5 minutes into the cooking cycle. Once that occurs, you will be looking at another couple of minutes before the peas will be ready to come off the grill. Be sure you monitor that you don’t go too far with the smoking process. If the peas begin to shrivel and wrinkle, you went too far. You can remove them and place in an ice bath or run under cold water to stop any additional cooking from taking place.

Smoking Snow Peas- Recipe Ideas

It’s so hard to explain the aroma that comes from the grill when you wood fire vegetables. Keep in mind, that even when the vegetables are chilled, they will retain their char flavor. Here are some tips to finishing these beautiful smoked sugar snow peas: add some crumbled feta cheese and serve, or a splash of lemon juice and dill, or even a dollop of ricotta cheese that’s been whipped with a bit of cream. You can also check into our next blog on peas where we feature these scrumptious beauties in a Snap Pea and Cucumber Salad, just perfect on a hot summer’s day!

First Turn on the Grill

First Turn on the Grill

The Culinary Team wants you to know

… that when it comes to the forgotten method of direct ember cooking with wood, there are many great food varieties besides your typical meats, poultry and seafoods that offer awesome flavor. This blog demonstrates how snow peas are one of many tasty garden variety veggies that will tickle your pallet with a great smoky wood-fired taste. There are many more foods for you to enjoy with this technique! Go ahead, experiment with your favorite vegetables or fruits and treat yourself to a “world of flavor” possibilities!

Bon-Bar-B-Q!

SmokinLicious® Products used for this recipe:

Wood Chips- Grande® Sapore

Dr. Smoke- try this simple technique and make NOT JUST ANY MAPLE SYRUP- but Smoked Maple Syrup!!

Dr. Smoke- You’re in store for a real flavor treat by smoking snow peas!

For more reading related to

For more reading on Smoking Snow Peas, try these recipes

Related recipes:

Try This Great Salad Recipe- Smoked Snow Peas With Cucumber

-GRILLED FRESH PEAS ADD SMOKY FLAVOR TO THIS PEA MASH

-SMOKED FAVA BEANS MAKE THE PERFECT DIP


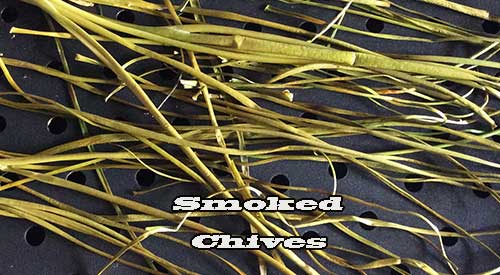
By our stove top smoked chives techniques we will be adding a pinch of smokey flavor to these wonderful bright green chives

By our stove top smoked chives techniques we will be adding a pinch of smokey flavor to these wonderful bright green chives


Fresh chives are in season so why not do something different with this wonderful herb and try your hand a smoking them! One of the easiest methods for controlling the heat and smoke level to a delicate item like herbs is to use a stove top smoker or stove top smoker set up with a cast iron pan. The point of smoking the chives is to add a depth of flavor to any recipe.

INGREDIENTS FOR STOVE TOP SMOKED CHIVES:

(more…)

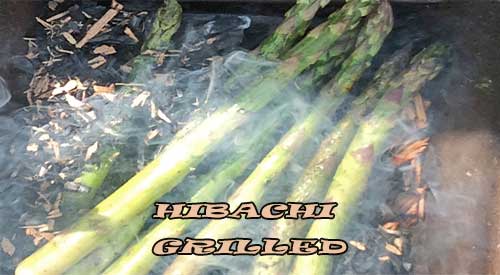
The first step for ember roasting fresh asparagus on a Hibachi!

The first step for ember roasting fresh asparagus on a Hibachi!

It’s Asparagus season and that means you should get the most out of this sensational vegetable while it’s fresh! Learn how easy it is to ember roast this thick skinned vegetable to bring out the fantastic flavor of this vegetable as a side dish, or used as an ingredient in other recipes like a refreshing dip, soup, or stuffing for meat or fish.

(more…)

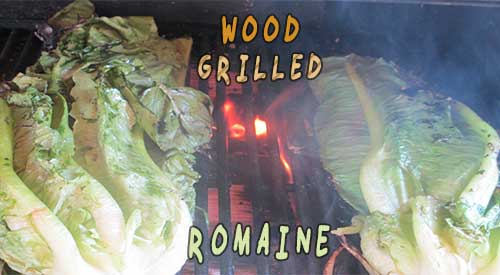
Wood grilled Romaine lettuce- Scrumptious!

Wood grilled Romaine lettuce- Scrumptious!

Try Wood Grilled Romaine Lettuce on the Grill Click To Tweet

Listen to our blog

It’s time to bring your vegetables into grilling season! Nothing beats the smell of fresh vegetables roasting over wood even on an LP/gas grill. Any time of the year works fine for this technique to get a great char wood flavor in your seasonal or store-bought fresh vegetables.

All you’ll need for this easy cooking experience is an LP or gas grill – any brand or size will do, double filet wood chunks from SmokinLicious®, and a head or two of fresh Romaine lettuce!

(more…)

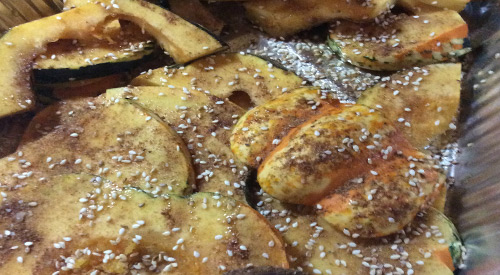
Our winter squash sliced and seasoned with Cumin and ready for the grill!

Our winter squash sliced and seasoned with Cumin and ready for the grill!

WOOD GRILLING WINTER SQUASH WITH CUMIN & HARDWOOD

listen to this blog


Full of color, flavor and packed with nutrients, winter squash makes for exceptional seasonal dishes, whether soups, casseroles, or desserts. Harvested in the approaching Fall, they are available all winter long due to their firm shells. With varieties such as sugar pumpkins, acorn squash, butternut squash, spaghetti squash, buttercup, and red kuri, sweetness level is always present.

Naturally low in fat and calories, yet rich in vitamins A, B6, C, and E, you can’t go wrong with any variety you select.

Today, I’ve elected to make cumin squash on the grill using confetti squash, so called due to the beautiful multi-skin coloring. Note, you may substitute any rounded winter squash available near you for this recipe.

(more…)

Smiling Burnese child before surgery for wide, bi-lateral cleft Lip repair. After surgery photo of same child showing the correction!

Smiling Burmese child before surgery for wide, bi-lateral cleft Lip repair. After surgery photo of same child showing the correction! DINING FOR SMILES EVENT PREPARATIONS

DINING FOR SMILES EVENT PREPARATIONS

listen to this blog


With the goal to repair children’s broken smiles by providing free comprehensive treatment for cleft lip and palate anomalies in under-served areas of the world, Alliance for Smiles, founded by six members of the San Francisco Rotary Club, Board member Carl Vahl (Chef Calle) hosted a gourmet, six-course dinner to raise funds for this exceptional cause at the Enchanted Valley Inn. And SmokinLicious® was right there to lend our support. We’re going to provide you with a behind-the-scenes look at what goes in to preparing a six-course gourmet meal featuring wood-fired fresh Canadian salmon and wood-fired leg and loin of lamb.

Dining for Smiles- Early Fire Start

Charwood burning in preparation for the grill and food cooking For SmokinLicious®, set up is crucial for a long event that has the menu relying on the perfection of the wood-fired proteins. That means ensuring plenty of charwood and wood chunks are at the ready. We keep two chimney starters loaded with charwood to keep a steady flow of hot coals going into the grills. Since this event’s gourmet menu featured four foods to be wood fired – lamb, salmon, red peppers, and Brussels sprouts – it’s necessary to get the fires going early so they can burn down to hot coal beds. That is the key to successful wood-fire cooking. Don’t cook over flames, only hot coals that will radiate heat throughout the grill.

Dining for Smiles- The Wood-Fired Foods

(more…)

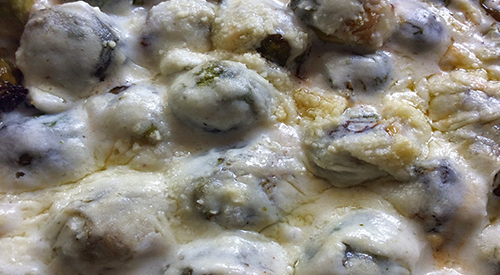
Our smoked Brussels sprouts with our creamy béchamel sauce make up this wonderful gratin. This is a great dish anytime but especially good around the holidays.

Gratin takes a smoky turn by using smoked brussels sprouts

GRATIN TAKES A SMOKY TURN

Listen to our blog


Gratin is one of those side dishes that usually gets made at the holidays or for a special occasion dinner. For some reason, it has the stigma of being difficult and time consuming.

Nothing could be further from the truth when you use our gratin recipe.

Gratin- Smoky Meets Creamy Goodness

In our previous series, we took whole Brussels sprouts and smoked them on the gas grill using Wild Cherry wood chunks. Taking the boldness of smoke, we knew blending that flavor with cheese would produce a balanced, creamy outcome.

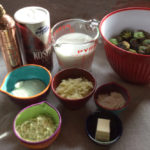
Our ingredients table has seven simple ingredients to make up this wonderful gratin

Most gratin recipes don’t contain a lot of ingredients but the béchamel sauce can be tricky if you don’t stay with your saucepan the whole time. For our gratin recipe you will need:

▪ 2 tablespoons butter

▪ 2 tablespoons flour

▪ coarse salt

▪ fresh ground pepper

▪ 2 cups whole milk

▪ 1/3 cup shredded Asiago cheese

▪ 1/3 cup shredded 2nd cheese like Fontina though I’m using a leek cheese

▪ 2/3 cup grated Parmesan

▪ 1-1/2 pounds of smoked Brussels sprouts

First up, making the béchamel sauce.

Gratin- Béchamel Sauce

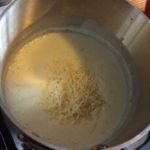
Our creamy bechamel sauce is being made in a pot on the stove top

Béchamel sauce is a fancy name for white sauce that starts with a roux of butter and flour. Begin melting two tablespoons of butter in a saucepan. Once melted we add 2 tablespoons of flour and begin the whisking process. This will produce a thick, paste like consistency. Gradually, add the two cups of whole milk, whisking the entire time. This is the key to a good béchamel sauce. Bring the sauce to a boil then reduce to low heat whisking again. Once thickened, season with salt and fresh ground pepper, and remove from the heat. Add in each cheese, whisking each addition until melted.

Gratin- Layer on the Flavor

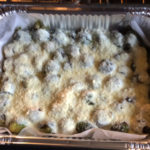
Our mixture of smoked Brussels sprouts and the bechamel sauce in our pan ready for cooking in our oven at 350 degrees for 25 minutes.

Time to lay the smoked Brussels sprouts in a baking dish. Try to use a dish big enough to make one even layer of sprouts. Pour the béchamel sauce over the Brussels sprouts ensuring an evening coating. Take the 2/3 cup of Parmesan cheese and sprinkle over the sauced sprouts. Place the baking dish in a preheated 350°F oven for 25 minutes until bubbling and golden.

The cheese cuts through the mild bitterness of the Brussels sprouts while the smoke flavor adds that special taste bud tingle.


Purchase products:

Wood Chunks- Single Filet

For more reading related to

For more reading related to our recipes

Additional reading:

-SMOKED CHEESE & BACON QUICHE FEATURING COLD SMOKED CHEESES

-TORTELLINI GETS A SMOKY MATE

-STEPPING UP RADISH SALAD WITH A WOOD-FIRED FLARE

Dr Smoke- "Add a wonderful flavor to your gratin by adding smoked Brussels sprouts- your guests will love this recipe."

Dr Smoke- “Add a wonderful flavor to your gratin by adding smoked Brussels sprouts- your guests will love this recipe.”

Tortellini Gets a Smoky Mate with the addition of Cherry wood smoked Brussel Sprouts! This is a medly and yummy recipe for the winter blues

Tortellini Gets a Smoky Mate with the addition of Cherry wood smoked Brussels Sprouts! This is a medley and yummy recipe for the winter blues


TORTELLINI GETS A SMOKY MATE


listen to the audio of this blog posting

There is something about the perfect pasta dish that isn’t necessarily loaded with a ton of ingredients. I’ve found that the perfect pasta often features only 2-3 ingredients in addition to seasonings. For me, the perfection is in how each of those ingredients contribute to the overall dish.

This is a pasta dish that features the smokiness of Brussels sprouts paired with the citric acid of lemon peel. Mix in the sweetness of caramelized onion and a full-bodied dish emerges.

Tortellini Gets a Smoky Mate- A Smoky Start

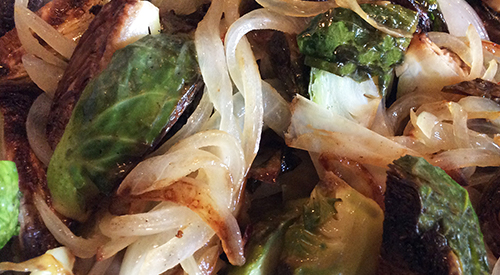
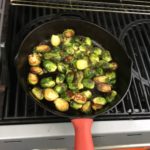
TBrussell Sprouts on the grill soaking up the flavors of the cherry wood pieces we added to the grill. he simplicity of the ingredients is what makes this such a flavorful and pleasurable dish. Start by smoking about a pound of Brussels sprouts – you can see our previous series on how to smoke these on the gas grill, an extremely easy and quick method. Then gather 3 tablespoons butter, 1 medium yellow onion that is thinly sliced, 1 tablespoon extra virgin olive oil or flavored olive oil, 1-1/2 teaspoons Kosher salt, fresh ground pepper, 1 lb. of cheese tortellini, and the zest of 1 lemon. With the Brussels sprouts already smoked, the cooking time for the rest of the dish is about 20 minutes.
Producing Aromatic Flavors

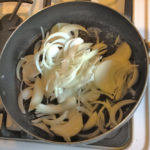
Put a pot of water on for the tortellini to cook according to the packaged directions. What keeps this recipe extra simple is you can use frozen tortellini or fresh packaged rather than making your own and it will be just as spectacular a dish as if you made every ingredient yourself. We start with thinly sliced yellow onion in melted butter, releasing the sweetness of the onion. Once translucent and browning, add the smoked Brussels sprout quarters. Toss together just until the Brussels sprouts heat through.

Cooking the onion in the skillet until they are translucent.

While the onion and Brussels sprouts cook, our water for the tortellini is salted and brought to a boil. Once at a rolling boil, the pound of cheese tortellini is added. I’m using a frozen variety but you can certainly use fresh. Remember, tortellini is a filled pasta that does not take much time to cook to al dente so don’t turn your back on the pot. It will only be a matter of minutes once the water regains boiling level. Tortellini has the proven sign of being cooked when they float. Once cooked, transfer to a large bowl.


Tortellini Gets a Smoky Mate- Easy Finish

With the tortellini cooked, it’s time to pour the cooked smoky Brussels sprout and onion into the bowl. Once combined, add the tablespoon of olive oil. I’m using a Tuscan flavored olive oil for just a bit more refined flavor but plain EVOO will do. Time to finish this off with fresh ground pepper and salt. The final ingredient – grated lemon zest. Zest right over the bowl. I like a lot of lemon zest so I zest the entire lemon.

After smoking Brussels sprouts using cherry wood, we made a hearty pasta dish that blended the flavors of sweet onion, smoky Brussels sprout, and lemon zest. Added to cheese tortellini gets a smoky mate, this is so flavorful and easy to make. Think of the many variations you can give this dish: adding butternut squash, or zucchini cubes, or perhaps chestnut when in season. Even artichoke hearts. So many opportunities to put your own fingerprint on this dish.

This recipe is sure to give you a great start on incorporating your favorite ingredients. We’d love to hear what you think about our blog post “Tortellini Gets a Smoky Mate” so leave us a comment and subscribe to get all our postings on techniques and recipes. Bringing innovation to wood fired cooking with recipes, techniques and the science behind the fire, that’s SmokinLicious®.

Purchase products:

Wood Chunks- Double & Single Filet

Related reading:

-STEPPING UP RADISH SALAD WITH A WOOD-FIRED FLARE

-HOW TO TURN YOUR LP/GAS GRILL INTO A SMOKER

Dr Smoke

Dr Smoke- “This is an easy way to bring smoke flavor to a pasta dish.”

« Previous PageNext Page »