There are so many ways to smoke a turkey with the main difference found in the amount of time for both preparation and cooking. One of the favorite methods is hot smoking whether done on a traditional smoker, charcoal grill, or gas grill.
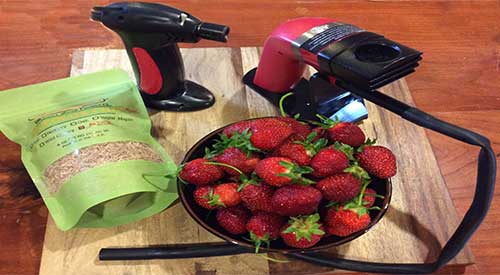
Fresh strawberries are pretty much available all year, so why not do something different with this fruit favorite and try your hand at smoking them! One of the easiest methods for controlling the smoke level to a fruit is to use a hand held food smoker.
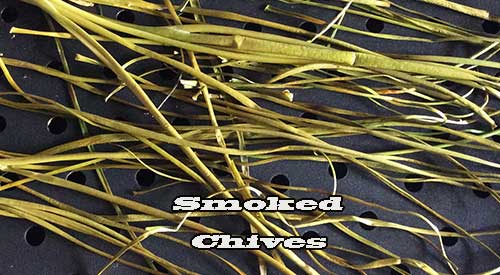
By our stove top smoked chives techniques we will be adding a pinch of smokey flavor to these wonderful bright green chives
Fresh chives are in season so why not do something different with this wonderful herb and try your hand a smoking them! One of the easiest methods for controlling the heat and smoke level to a delicate item like herbs is to use a stove top smoker or stove top smoker set up with a cast iron pan. The point of smoking the chives is to add a depth of flavor to any recipe.
INGREDIENTS FOR STOVE TOP SMOKED CHIVES:
A stove top wood smoker or cast iron pan with an insert pan for the chives and a lid
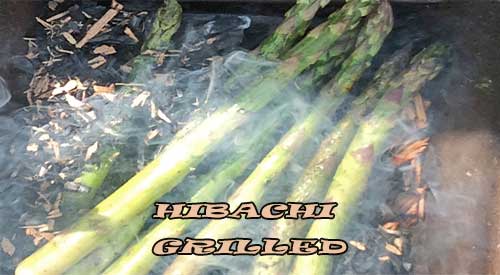
The first step for ember roasting fresh asparagus on a Hibachi!
It’s Asparagus season and that means you should get the most out of this sensational vegetable while it’s fresh! Learn how easy it is to ember roast this thick skinned vegetable to bring out the fantastic flavor of this vegetable as a side dish, or used as an ingredient in other recipes like a refreshing dip, soup, or stuffing for meat or fish.
You’ve seen us use our plancha to do squid, now we’re going to smoke some artichoke hearts and mushroom caps using just one application of wood chips. This time, our plancha will be set up with BeechPiccolo® wood chips to infuse wood flavoring into artichoke hearts and button mushroom caps for the ultimate stuffed mushroom appetizer. I’ll take you through the recipe and cooking technique using my plancha on the gas range. Easy entertaining starts here with Stuffed Smoked Artichoke Mushrooms.
Wood Firing the Artichoke Hearts
We start off with a 14 oz. can of artichoke hearts packed in water. This will be roughly 8 artichoke hearts. After draining, rinsing, and patting dry, we fire up the plancha on our gas range placing a small handful of SmokinLicious® Beech Piccolo° wood chips on the plancha. As the plancha temperature rises close to 300° F, it’s time to add the artichoke hearts to the smoker racks. Place the cover on the plancha and let the artichoke smoke for about 8 minutes, turning one time half way through the cooking time. Then remove the hearts from the plancha, rough chop them, and put aside for the mushroom filling.
Button Mushroom Caps
Next on the plancha go the mushroom caps. We prepared them by first washing them, patting them dry, and then removing the stems. The stems are reserved to be used in the filling mix. If you want extra smoky flavor, feel free to smoke the stems as well but you should smoke them separate from the caps so they don’t shrink and lose too much water.
We’re still using the Beech wood chips that were used for the artichoke hearts as these still have plenty of smoke vapor to be released. Again, these mushroom caps will only take a matter of minutes. Remember, mushrooms are loaded with water so don’t let the caps stay on the plancha too long causing them to shrink and fall apart. Just bronze them with the smoke vapor, then remove to be stuffed. A good sign that they are ready to come off the plancha is when you see a small puddle of water forming in the cap.
Mushroom Cap Filling
With the artichoke hearts and mushroom caps smoked, it’s time to start on the filling. Here are the ingredients need for the filling:
2 tablespoons unsalted butter
3 cloves garlic, minced
1 small shallot, minced
kosher salt and fresh ground pepper to taste
½ cup dry white wine
1 cup grated parmesan
¾ cup panko breadcrumbs
3 tablespoons finely chopped parsley
1 tablespoon finely chopped thyme
1 egg white
First, I chop the mushroom stems, dice the shallots, and mince the garlic cloves. In goes the butter to a hot skillet, then all three prepared ingredients are added. Once cooked down, the white wine is added to the mixture with cooking continuing until the wine has evaporated. This is a highly aromatic filling that will blend well with the smoky flavors of the artichoke and mushroom.
The aromatics are now ready for the rest of the filling ingredients. First, add the chopped smoked artichokes hearts. Next in, the parmesan, bread crumbs, parsley, thyme, and egg white. Mix everything together until it binds well. Time to fill the smoked mushroom caps. Using a teaspoon, I fill each mushroom cap heaping the filling on top. Although we prepared 20 mushroom caps, there is enough filling to do 40-50 caps depending on the size of the mushrooms selected. I place these in a baking dish and slide them into a pre-heated 350°F oven for about 30 minutes.
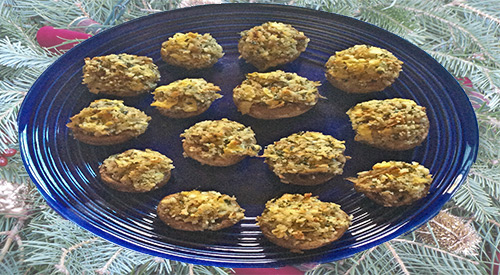
Soon to be the Favorite Stuffed Mushroom Appetizer
After smoking both the artichoke hearts and the mushroom caps, I infused the filling with the smoked, chopped artichoke hearts. With the additional flavors of parmesan, thyme, parsley, garlic, shallot and wine, these mushroom caps are full of flavors including that subtle smoke undertone. These are sure to become a favorite appetizer or snack. Plus, when done on the plancha, they can be smoked year round without concern for the weather.
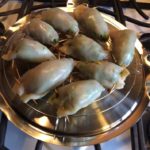
Bringing smoke flavor to stuffed squid done on the plancha will provide wonderful and unique flavor to this appetizer.
STUFFED SQUID COOKED ON THE PLANCHA
We love demonstrating the versatility of SmokinLicious® products with all types of equipment. We’re taking our Piccolo® wood chips to the plancha to smoke infuse some stuffed squid for a unique appetizer. Don’t own a plancha? You can do the same thing with a standard stovetop griddle and a small roasting rack. Or, use a charcoal or gas grill with some wood chunks for the same smoky flavor.
Plancha Cooking
A plancha is a flat top grill made of heavy metal that can be placed on any type of heat source: electric, gas, infrared, induction, charcoal grill, gas grill. Basically, a plancha is a griddle made of metal.
What’s great about a plancha is you can do simple hot smoke infusion using a micro wood chip that is quite fast due to the intense heat these quality metal cookware pieces produce.
My plancha is made by the French company, Mastrad. I prepare the plancha by placing it on my heat source – in this case my gas range – set the heat level to medium-high, place a handful of SmokinLicious®Piccolo® Wood Chips in Beech size #10 on the plancha, and place the two smoking racks on the griddle. I’ll give the wood chips about 5 minutes to heat up and start releasing smoke, then it’s time to place on the stuffed squid bodies.
1-1/2 heads of frisee or other green lettuce, coarsely chopped
2 teaspoons capers
2 tablespoons plus 1 teaspoon extra-virgin olive oil
1 lime, zested and juiced
Kosher salt and fresh ground pepper
1-1/2 pounds squid, bodies only, rinsed – should be about 8 bodies
Stuffed Squid- Making Stuffing
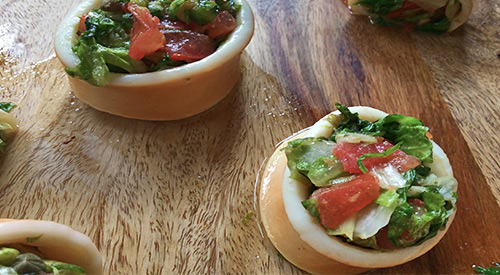
Time to make the squid stuffing. Taking a medium bowl, combine the seeded and diced tomato, chopped greens, and capers. In a small bowl, make the dressing by whisking together the 2 tablespoons extra virgin olive oil, lime juice and zest, salt, and pepper. Drizzle over the stuffing mixture and toss to coat.
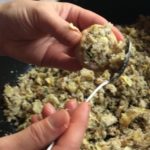
Stuffing the Squid
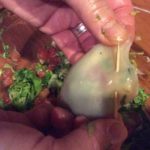
Taking one squid body at a time, fill with the stuffing mix using a teaspoon within ½ inch of the open top. Then lace a toothpick through the top. Brush all the bodies with the remaining teaspoon of olive oil. Then they’re ready to place on the hot plancha.
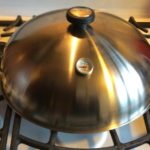
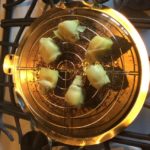
Stuffed Squid- Plancha Cooking
With the wood chips hot and releasing smoke vapor, I place the readied stuffed squid on the cooking racks. These will cook and smoke for about 7 minutes before I will turn them. Another 4-5 minutes on the other side, and you’ll see a golden hue and plump shiny bodies emerge. Turn off the heat to your plancha and carefully remove the squid. Cut into 1-inch slices and serve warm.
There are many variations to stuffing squid bodies but this is one that is essentially vegetarian in design so it can be enjoyed by everyone.
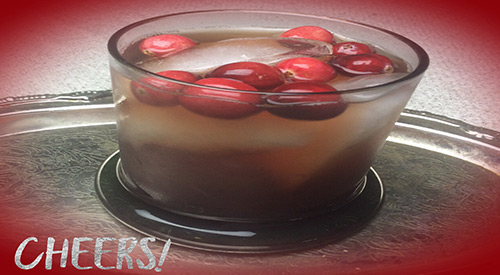
Smoky bourbon cranberry cocktail is a simple but elegant drink for holiday celebrations during the colder months.
SMOKY BOURBON CRANBERRY COCKTAIL
For those of you who love bourbon, we’ve got a special cocktail for the sampling. This is a rather festive drink containing cranberry. We add an additional layer of flavor by cold smoking the cranberry cocktail syrup for a unique blend of sweet, tart, and smoky. Let’s get started on how it’s done.
Smoky Bourbon Cranberry Cocktail- Making Cranberry Syrup
Our smoked bourbon cranberry cocktail starts with the ingredients for a cocktail syrup. Similar to traditional simple syrup, this one has a bit more acid in the form of white wine vinegar. You’ll need to gather together:
1 cup of fresh or frozen cranberries
1 cup of white wine vinegar
Sugar- 1 cup
You also need a saucepan and heat tolerant spoon.
Start by placing a saucepan over medium-high heat. Add the white wine vinegar and the cup of sugar and stir to dissolve the sugar. Next in, one cup of cranberries, fresh or frozen, though I’m using fresh as they are available at the time of this recipe. Bring the mixture to a boil stirring constantly. Once the sugar is dissolved and the cranberries have reduced, remove from the heat and allow to cool in the saucepan. While the mixture is cooling, let’s prepare the handheld smoker for the smoke vapor infusion.
Cold Smoking is in Your Hand
It’s never been so easy to produce smoked ingredients with the development of the handheld food smoker. It all began with The Smoking Gun™ which is the unit I will be using today, but know there are many options available to you. I set up my handheld food smoker with Sugar Maple Minuto® Wood Chips.
Bringing the cooled saucepan to a table, I have a piece of press and seal at the ready, but you can use plastic wrap, a food storage bag, or vacuum bag, anything that will provide a seal. I seal around the saucepan leaving a small opening to insert the tubing of the food smoker. Turning the unit’s fan on, I light the wood chips and allow the smoke vapor to fill the saucepan. Once filled, I release the tubing from the pan and seal the pan completely with the wrap, allowing the smoke to penetrate the cranberry syrup. The longer the pan stays wrapped, the more smoke flavor the syrup will take on. Once infused, remove the wrap and prepare to make the cocktail.
Smoky Bourbon Cranberry Cocktail- Building a Smoky Cocktail
To make the cocktail, place ice in a rock glass. Add ¼ cup plus a splash of your favorite bourbon. Add two tablespoons of seltzer and two tablespoons of the cranberry syrup. Stir and add a tablespoon of fresh cranberries. It’s now ready to serve! Smoky Bourbon Cranberry Cocktail – a unique drink for all those bourbon lovers you know.
SUCCULENT WOOD FIRED STUFFED TOMATO WITH HERB RICE
It’s tomato season! Boy, do we have a great technique for you to try on your charcoal grill as well as a tasty recipe to make- wood fired stuffed tomato.
Bring 8 large tomatoes in from the garden or purchased at the fresh market, clean out the charcoal grill, fire pit, or fireplace, and give a few hours to a great cooking experience and exceptionally flavorful recipe.
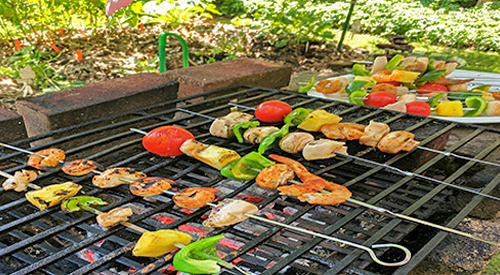
Having the experience of viewing her dad, our youngest staff member tried her hand at grilling for the first time! Look how great these Kabobs look!
MY FIRST EXPERIENCE AT THE CHARCOAL GRILL (by the intern)
I’ve had a lot of experience over the years watching my Dad at our homemade barbecue pit. I’ve never had the experience of doing the actual prep and cooking until now.
I’m taking on the grill and preparing some kabobs using charcoal and wood. This is my first attempt at cooking on the charcoal grill without any help. Learn what worked and didn’t work for me, a 20 year old who tackles the fire!
Selecting My Menu
In deciding on a menu and given that it is the hot summer in the East, I went with kabobs. Shrimp and chicken were selected as proteins and an assortment of vegetables plus pineapple for sweet.
I purchased fresh, de-veined shrimp to cut down on some prep time. After washing the shrimp, I laid them out on paper towels and pat dry with additional paper towels. To get a good char on the shrimp, I’ve read how important it is to get as much water out of the shrimp.
Something I learned after: I should have sprinkled a little kosher salt to aid the water removal.
For my chicken, I purchased chicken breasts with the skin already removed and cut these into cubes trying to keep all the pieces the same size for even cooking.
Protein Preparation
I wanted a little spice to the menu so I elected to use a Cajun seasoning on my shrimp. I made sure every piece was coated well.
Something I learned after: if I had prepared these even a few hours early, I could have sealed them in a storage bag and let them really infuse the flavor. For my chicken cubes, I marinated in a simple preparation of Italian salad dressing. This protein I did marinate overnight.
Other Preparation
I decided to incorporate more traditional items for my kabobs like tomato, pepper, mushroom and pineapple. I do a simple wash of the vegetables, then cut peppers and pineapple into even pieces big enough to be skewered. Button mushrooms are left whole as are my small tomato rounds. I make sure everything is at the ready to make assembly easy. I think this step in the kabob making was relatively easy to manage.
Kabob Assembly
As you can see, I did a bit of variation to my assembly process for the kabobs. I did mix my vegetables and fruit on a single skewer as well as my two proteins.
Something I learned after: I should have first oiled the skewer to ensure ease in removal of the food items once cooked. I also should have made skewers with the same food item on them so I could control the timing each item takes to cook. So, next time I will have full skewers of mushroom caps, full skewers of pepper, full skewer of shrimp, etc.
Charcoal Barbecue Setup
My barbecue is an open pit style, hearth level, hand built by my Dad. When cooking, we generally use charcoal or charwood with wood chunks and chips for flavor. Today, I went with Sugar Maple chunks (double filet size), for the kabobs. I learned the importance of starting a chimney starter of charcoal first to be sure all the coals are hot before they go into the charcoal area of my pit.
Something I learned after: if your grill is in a safe area, you can start the chimney starter while preparing the food items so by the time you get everything prepped, the coals are hot and ready to go.
Once my embers are burning red and starting to gray over, it’s time to pour them into the chimney brazier. My pit will hold about 6 lbs. of charcoal. Once the charcoal is in, I add my Sugar Maple wood chunks for flavor to the kabobs.
Something I learned after: I should have laid a bed of unlit coals in the charcoal brazier. That way, I could be sure to have enough heat for the entire cooking process and I would have a chance to use the hot embers later for other cooking.
Time to Grill
With my grilling grates in place, it’s time to add the foods. I ended up putting a series of skewers on the grates trying not to crowd the grates. I did cook some of the chicken and shrimp off the skewers to give my guests options for just extra protein.
Something I learned after: I really didn’t give much thought to the cooking time of each item so some things were cooking faster and drying out before others. Shrimp cooks faster than chicken so lesson learned: chicken needs to go on first. Plus, I need to brush with marinade or oil to keep things moist.
Lessons Learned
For my first ever effort at making kabobs on the charcoal pit, I was pleased with the results. Without question the sugar maple chunks from SmokinLicious®added to the great flavor. I was amazed at just how little wood it took to impart that smoky quality to the foods. I learned quite a bit along the way: my sequence of adding items to the grill needs to change. My longer cook items like chicken, peppers and mushroom need to go on first. That’s where having skewers made with just the one ingredient will really come in handy. Pineapple, tomato, and shrimp certainly take less time. I also need to keep a basting brush and cup at the grill so I can coat the food items either with marinade or oil to keep the moisture locked in the food.
Toasting Marshmallow & Peanut Butter Cup S’more
A great way to use the hot embers leftover when your main dish cooking is done is a simple dessert. Nothing shouts summer and fun like a s’more! Graham cracker, peanut butter cups, and marshmallow fired in the hot embers – oh so yummy good!
I hope you enjoyed this first-time griller’s experience at the charcoal grill. Leave a comment and subscribe to us so we can keep bringing you innovative tips, techniques, and recipes on working with wood for cooking, grilling & smoking.
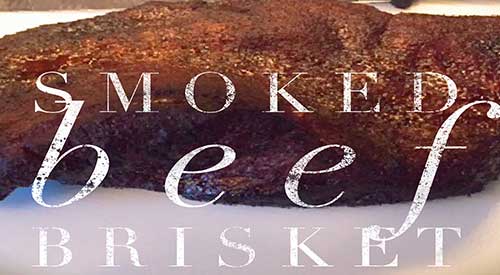
We receive a lot of questions about preparing and smoking a beef brisket on different equipment. There is no question, that people in North America love their beef and anyone who has sampled prime BBQ knows that brisket has a truly unique flavor that puts this food experience on many people’s bucket list. Let me share some of the key tips we offer as well as some of the interesting questions posed regarding this infamous meat.


 Wood Firing the Artichoke Hearts
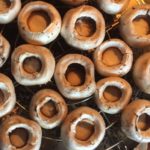 Button Mushroom Caps